how to enable/disable USB debugging
USB debugging.
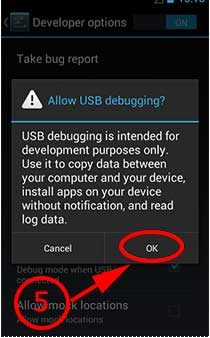
USB debugging is intended for development purposes. It can be used to copy data between your computer and your device and to install apps from your computer. USB debugging will be used for rooting, backing up, installing a custom ROM, tacking screenshots from computer and more. Enabling USB debugging will be differ for some android versions.
How to enable USB debugging
In order to enable USB debugging find your android version and follow appropriate method to enable USB debugging.
For Android version 2.0 to 2.3
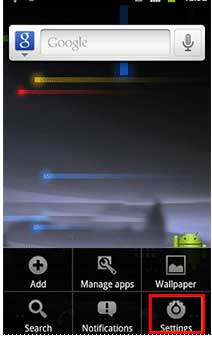
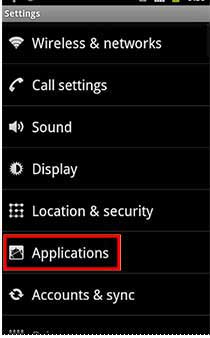
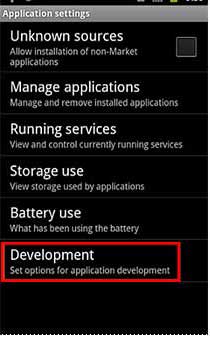
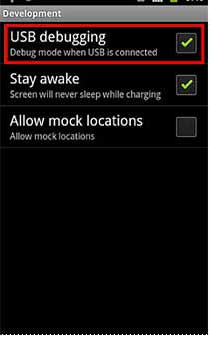
Go to “Settings” -> “Applications” -> “Development” -> “USB Debugging”
For Android version 3.0 to 4.1
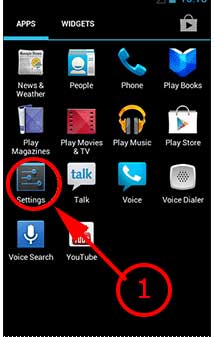
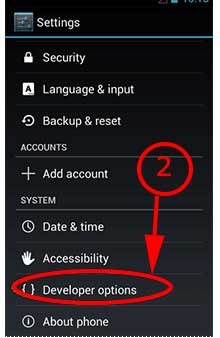
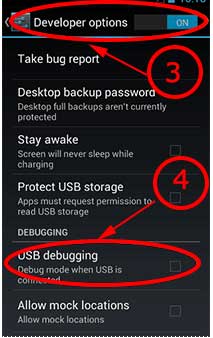
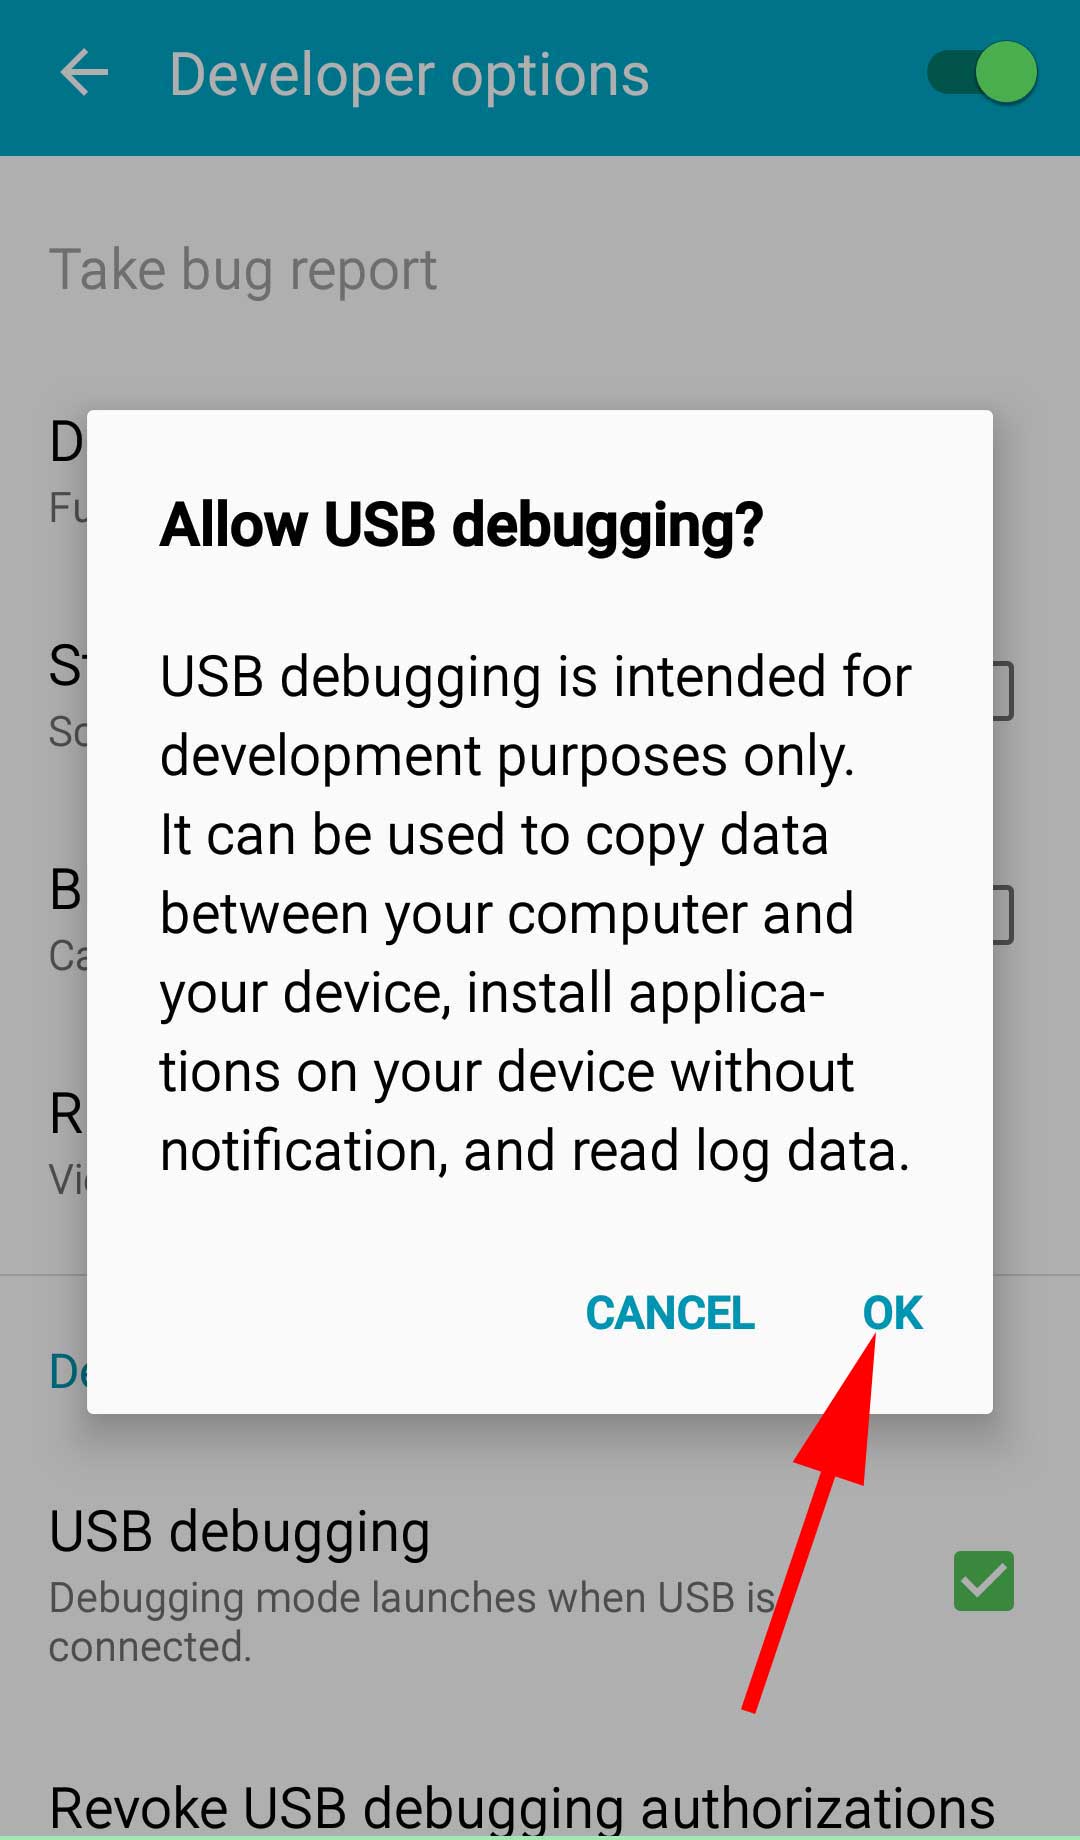
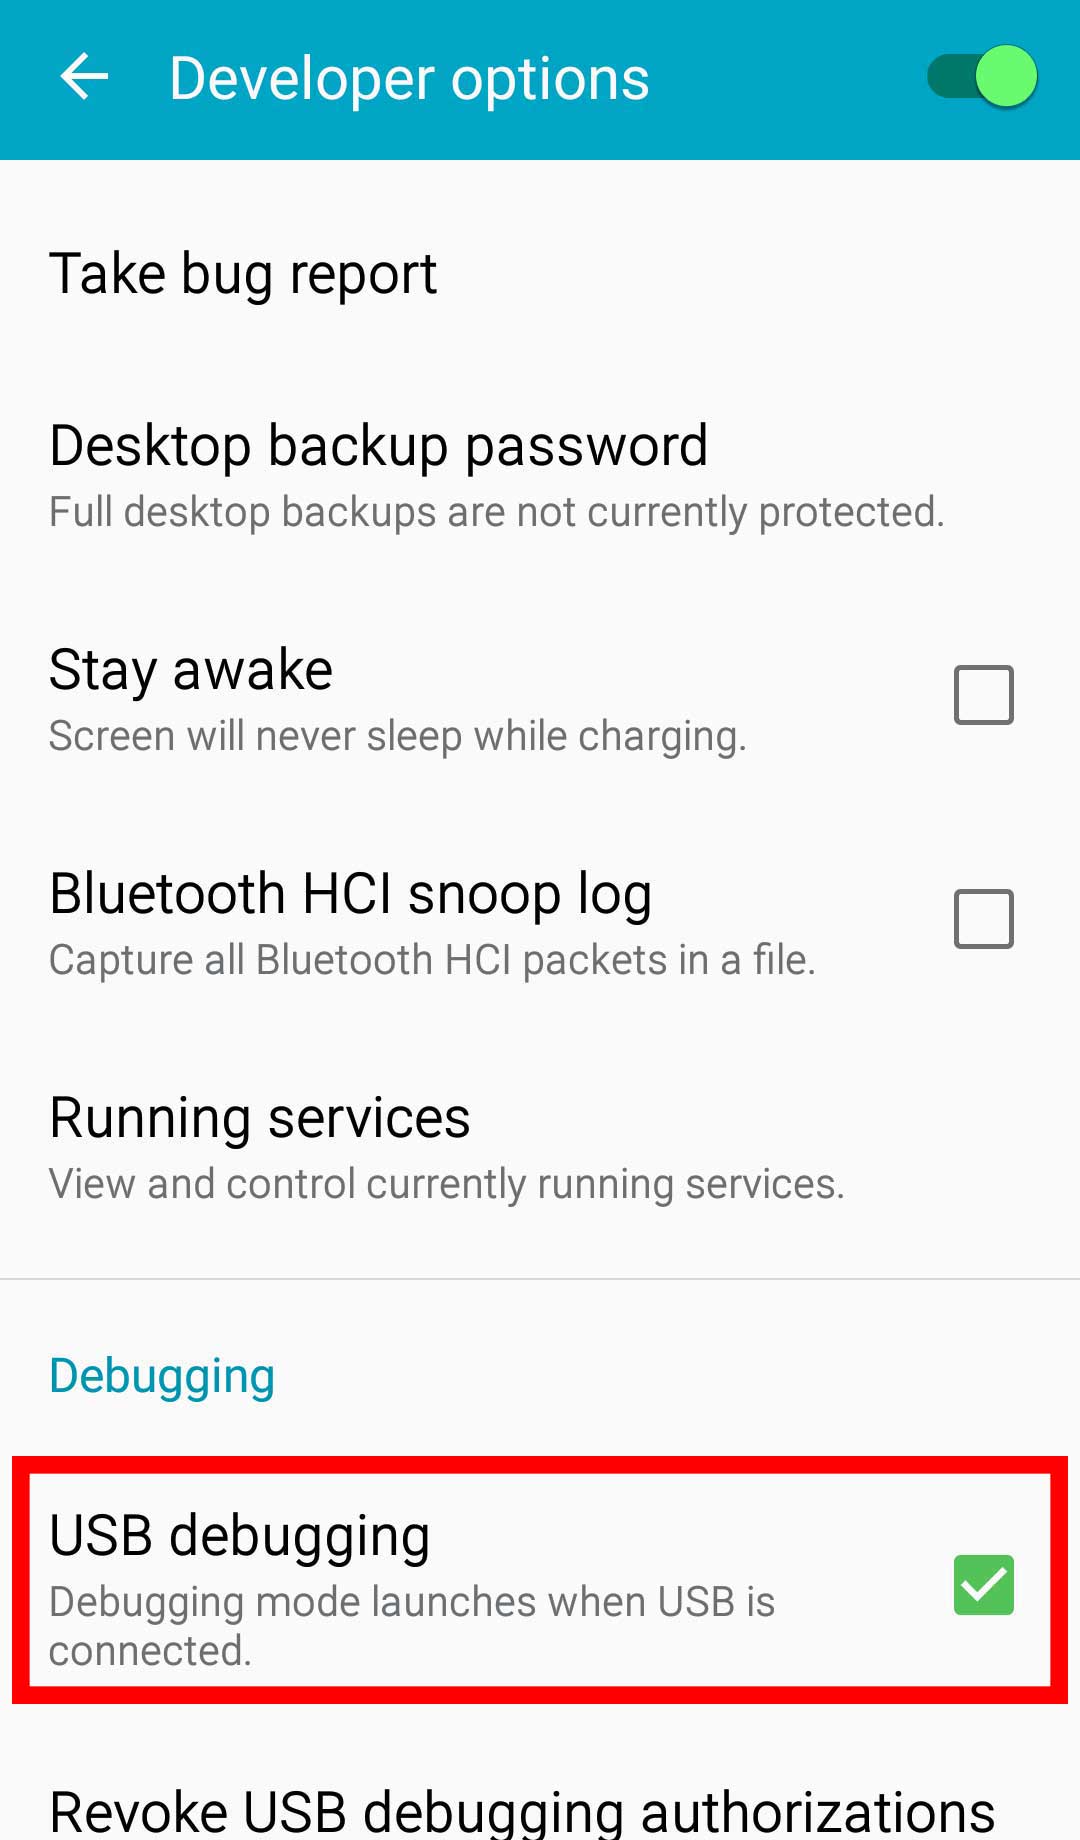
Go to “Settings” -> “Developer Options” -> “USB Debugging”
For Android version 4.2 to latest
From android os version 4.2 to latest version “USB debugging” is hidden.
- First enable “Developer options”
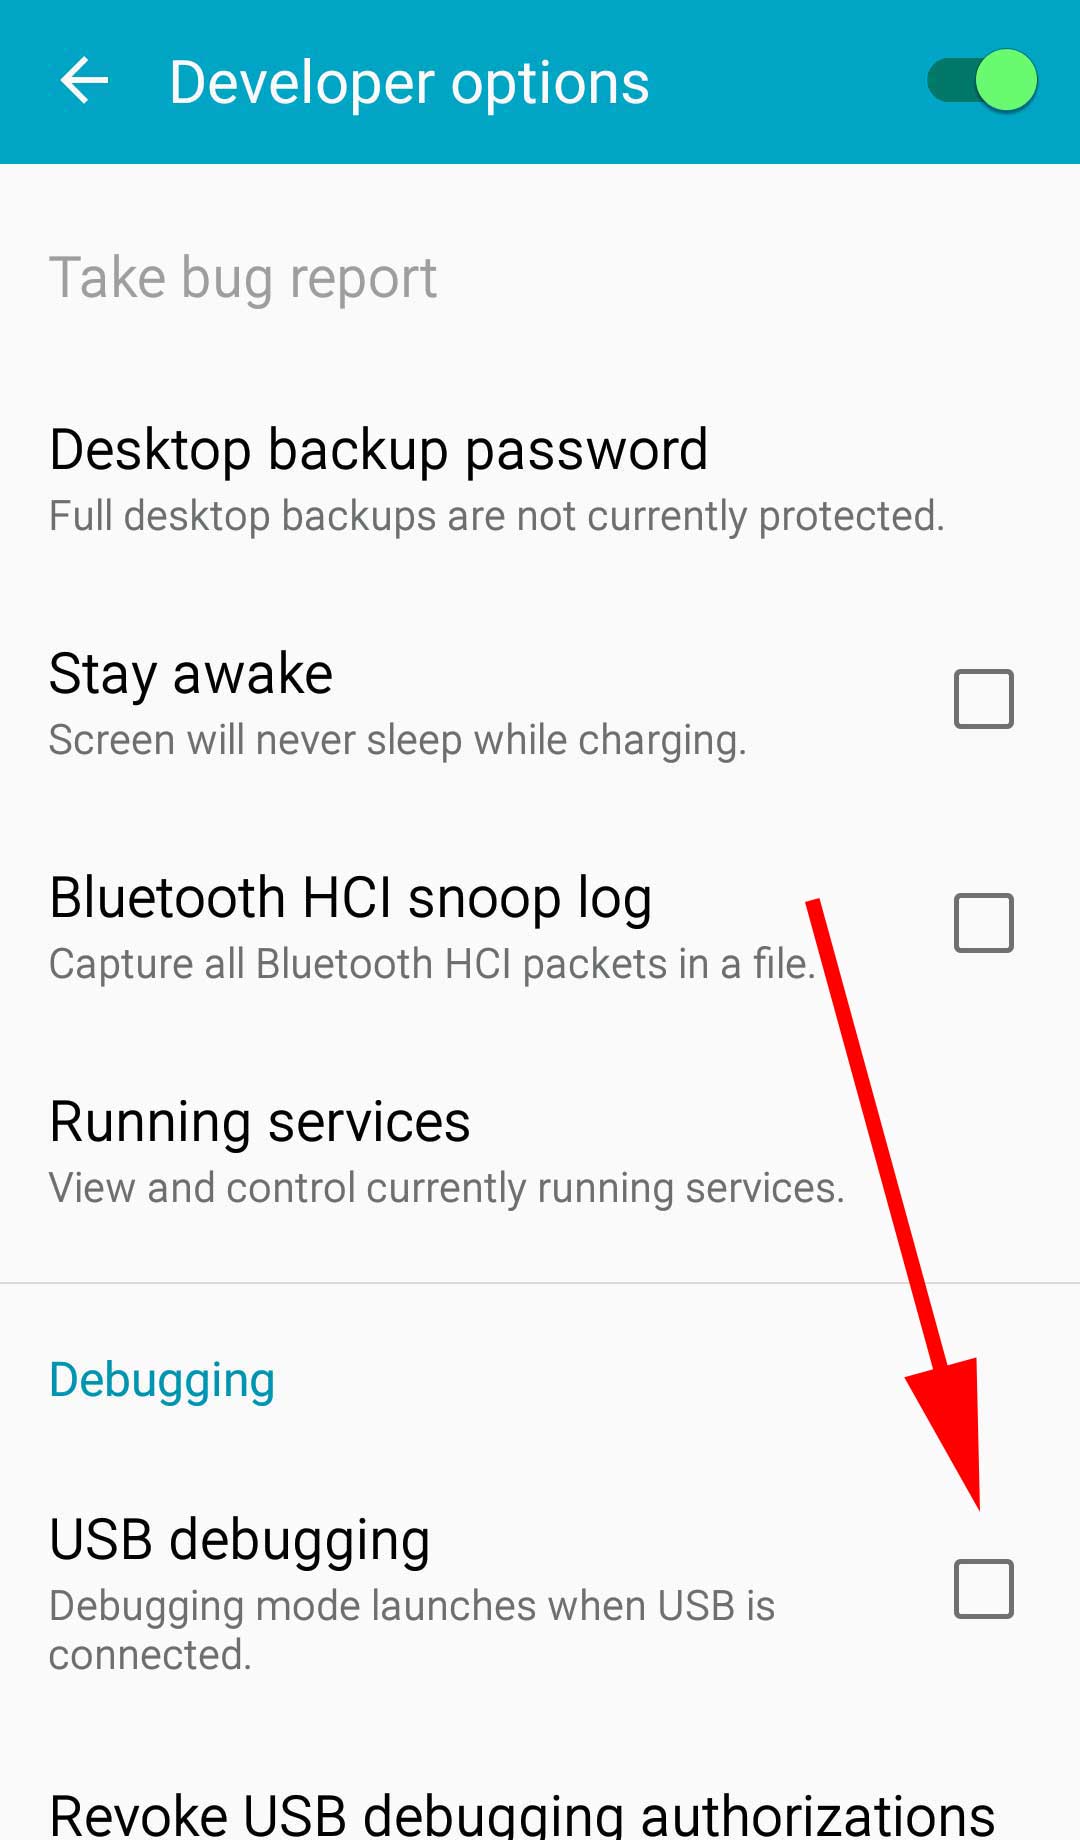
- Then enable “USB debugging” in developer options menu.
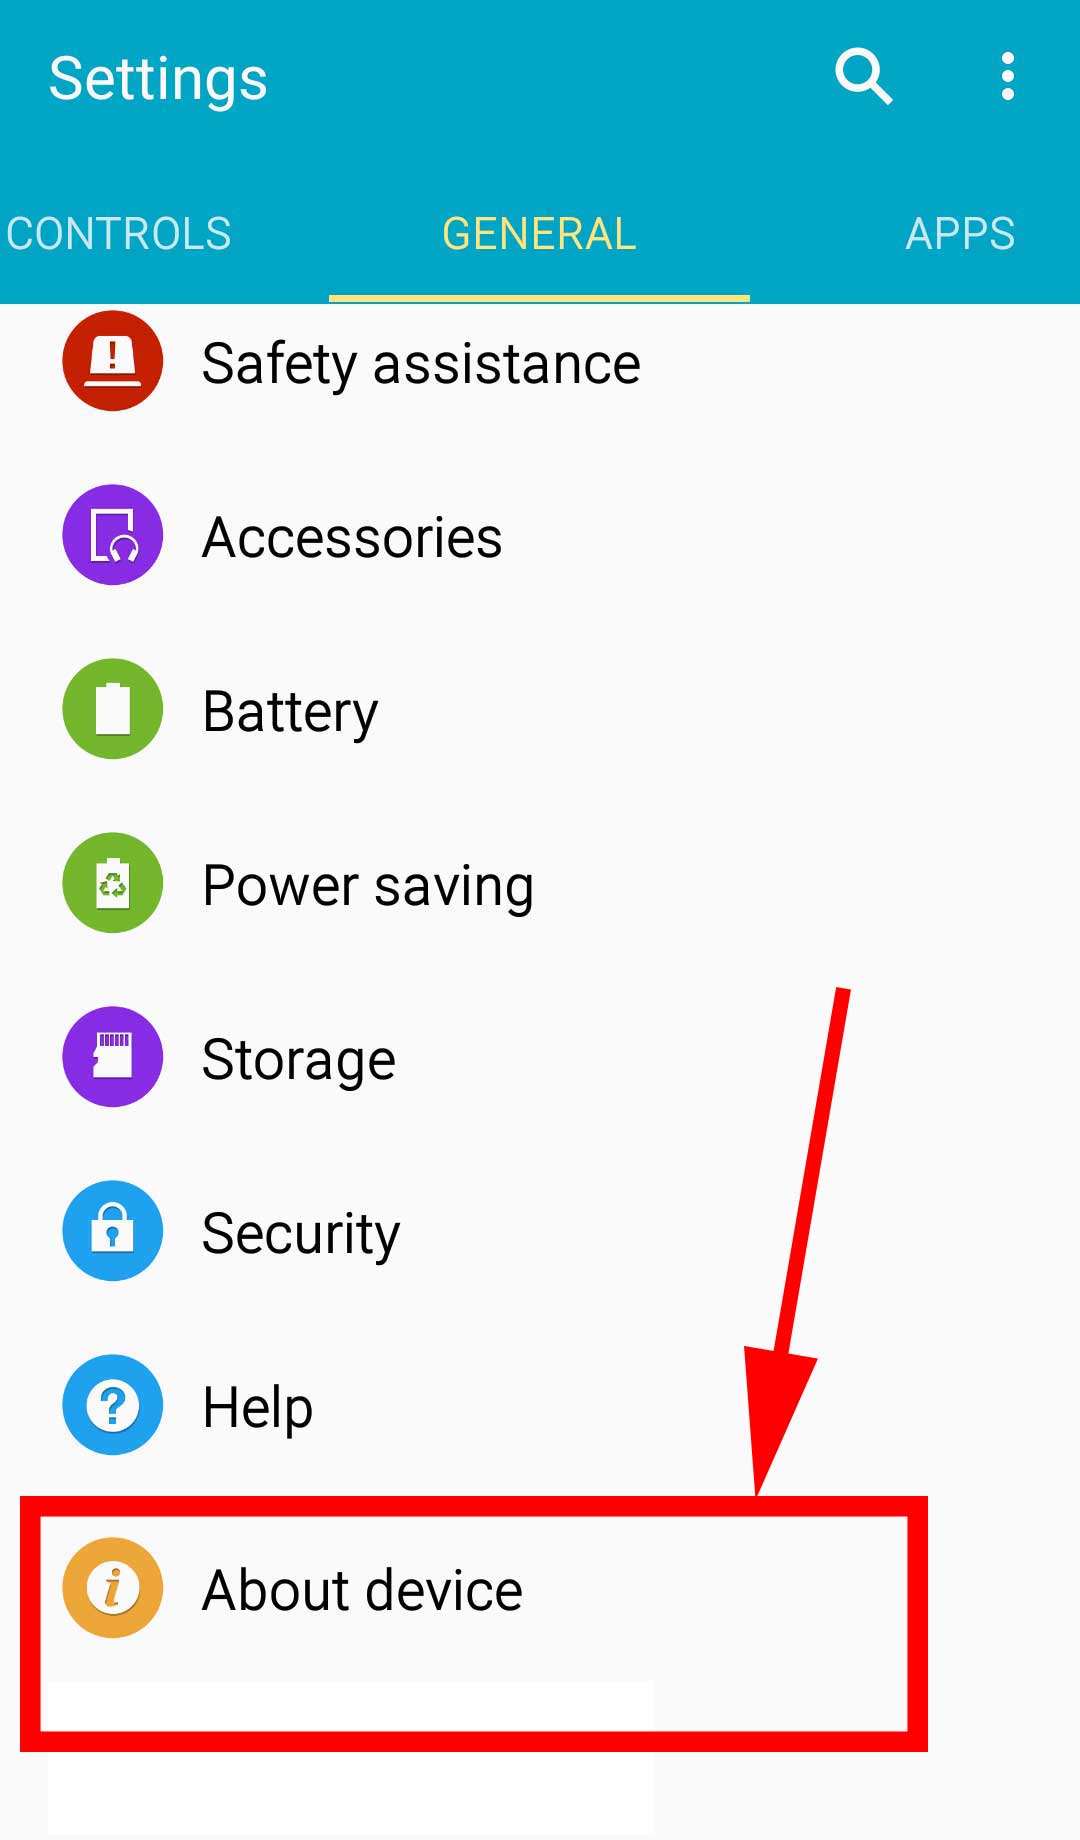
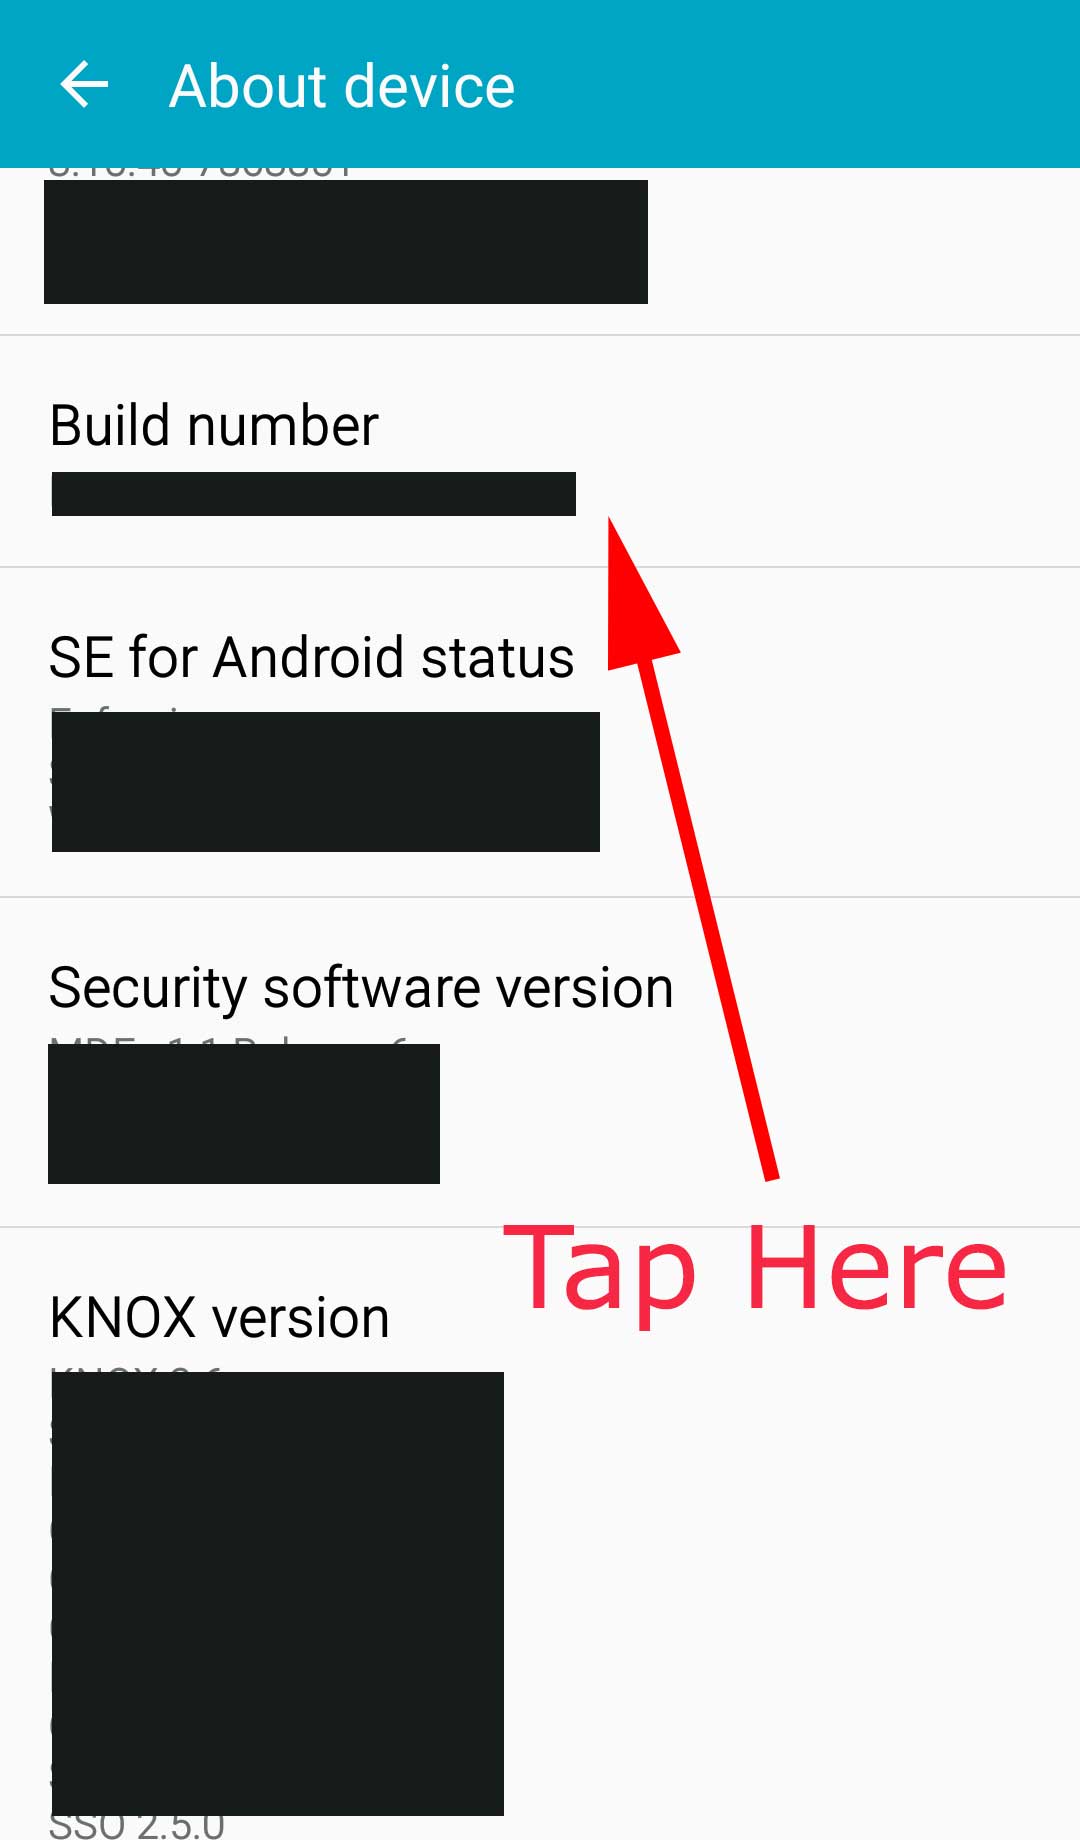
Go to “Settings” -> “About Phone” -> Tap 7 times on “Buid Number”
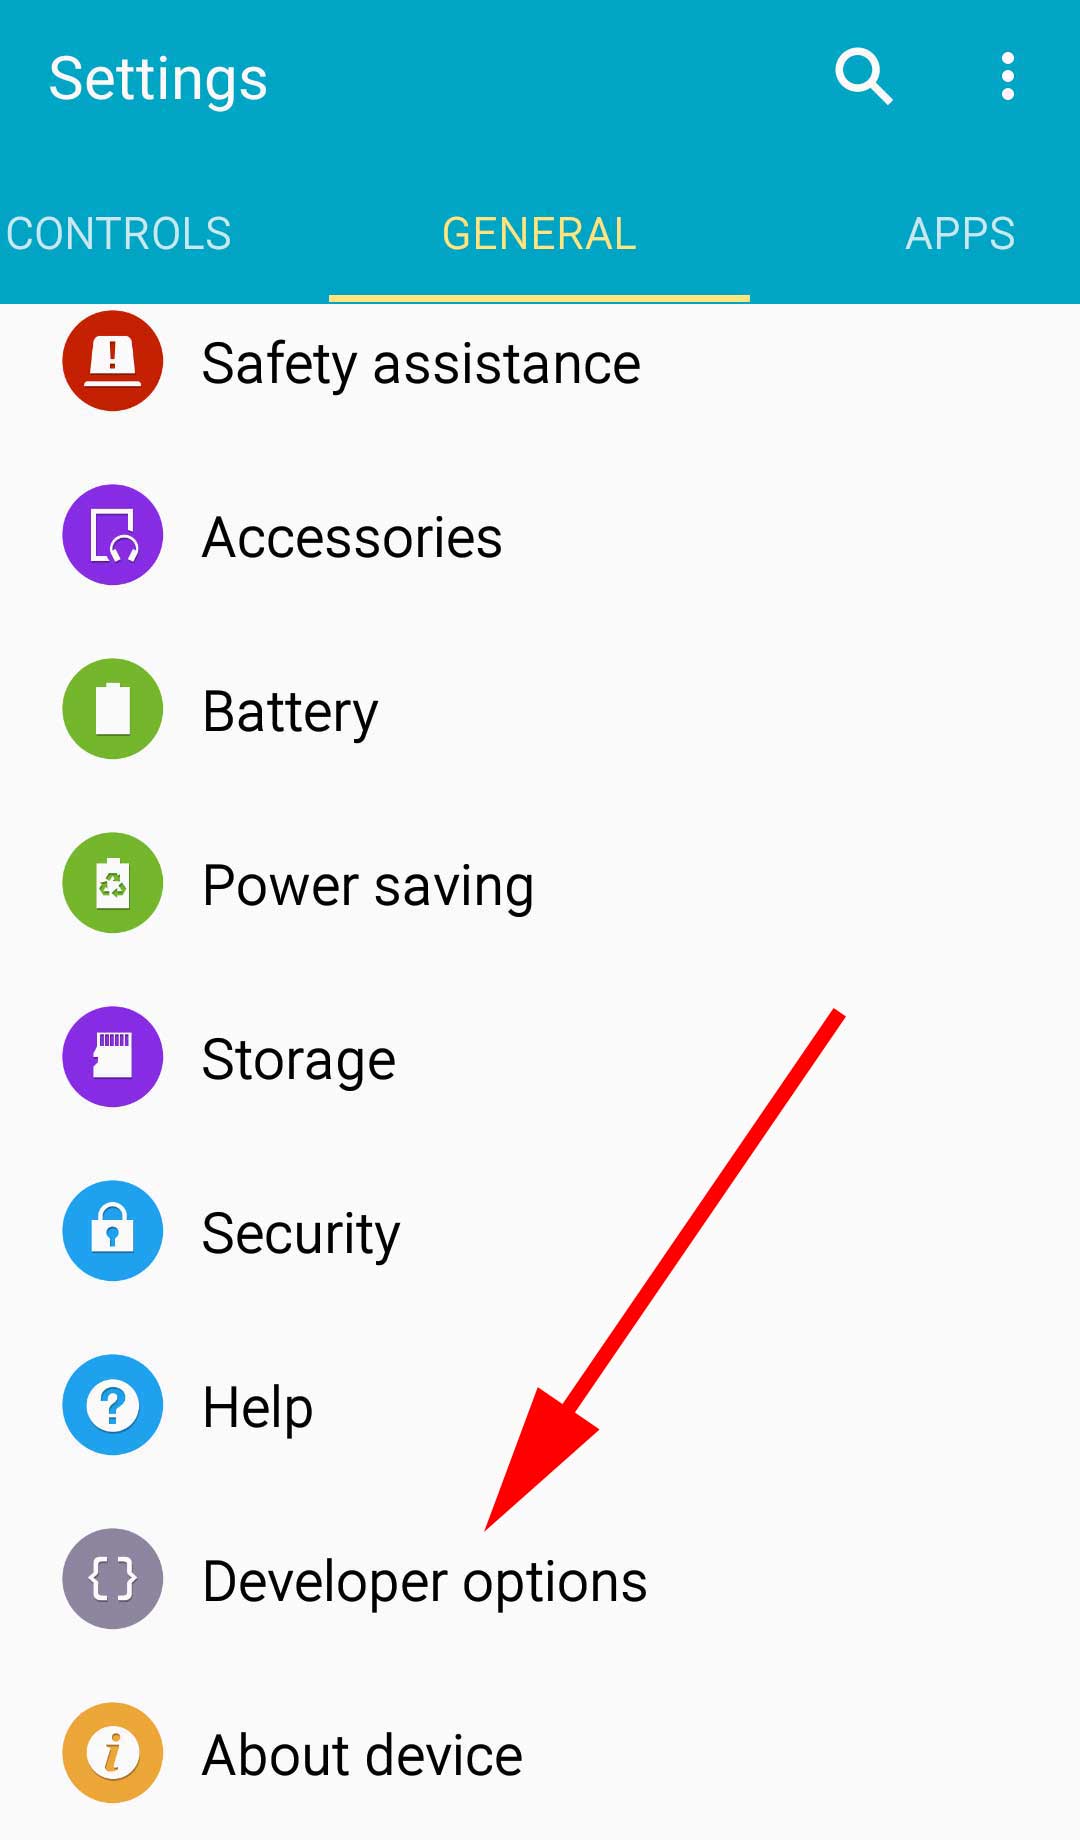
Then go to “Settings” -> “Developer Options” -> “USB Debugging”
How to disable USB debugging
There is no harder process just un tick “USB debugging” option from developer options.
“USB Debugging” should be disabled after using it. Because keeping it open will enable several security risks. This mode enable high level access to your device. If you connect your phone to public charging point, the port could use the USB access to your phone to access data on your phone or install malware. This could happen when and only when USB debugging mode is enabled. So it is safe to disable “USB debugging” after using it.